For customers who cannot access the embedded link:
NOTE: The instructions below are to help customers insert their existing bookings within their signature so, before proceeding with the following, make sure you have your bookings already setup.
1. Navigate to https://outlook.office.com/bookings/homepage

2. Click this icon to copy the URL

Create custom attribute
3. Navigate to Exchange admin center
4. Click Mailboxes

5. Select the relevant user

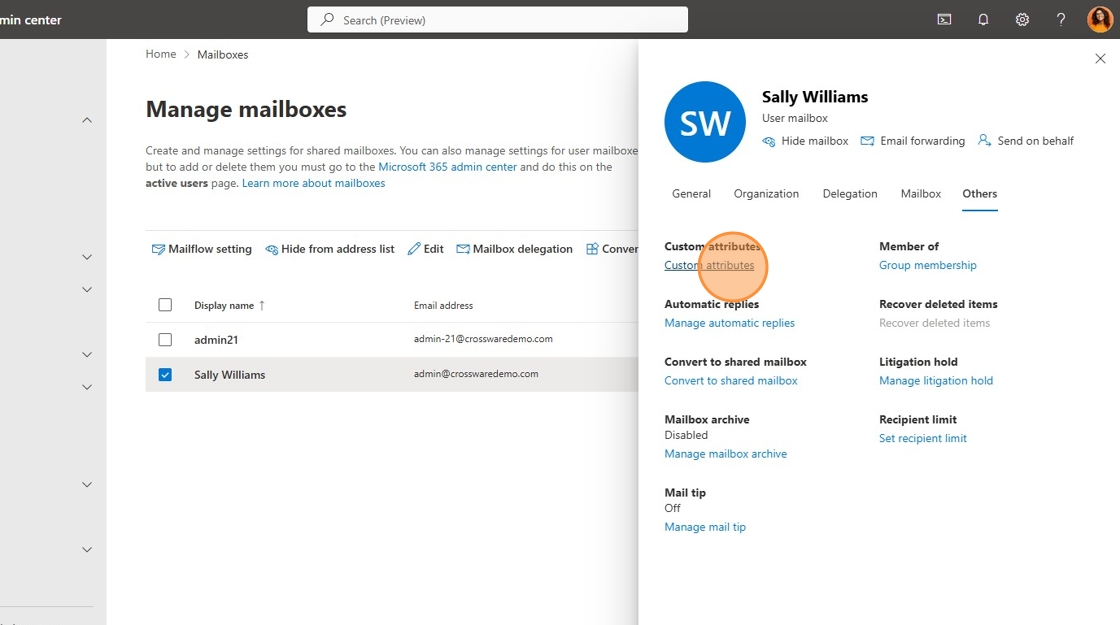
6. Click the Others tab

7. Click Custom attributes

8. Select an empty attribute field

9. Insert the copied URL > Click Save

Create directory field in the Crossware portal
10. Navigate to Crossware Mail Signature
11. Click the Fields page

12. Click Create directory field

13. Give the field a name (e.g., Booking)
14. Click the Directory Attribute text box

15. Enter the attribute name (e.g., onPremisesExtensionAttributes:extensionAttribute10)
See the article below for more information on Custom Attributes:
KA-01459 | Crossware Knowledge Base

16. Click SAVE & CLOSE

17. Click on the Home/Signature configuration page

18. Click Edit on the relevant signature

19. Edit the signature

20. Paste the Booking Page's URL

21. Highlight the URL > Click the Link button

22. Select the "<other>" option.

23. Replace the URL with the recently created directory field (e.g., (!Booking!) )

24. Click OK

25. Click SAVE & CLOSE

Test Directory Field
26. Re-open the signature > Click Send Test Email

27. Click SEND

Results:


