Create New Signature
To create a signature design simply select CREATE NEW to create your signature design or build a signature using a template CREATE FROM TEMPLATE.
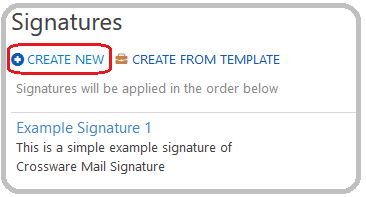
To create a New Signature click on Signatures > CREATE NEW
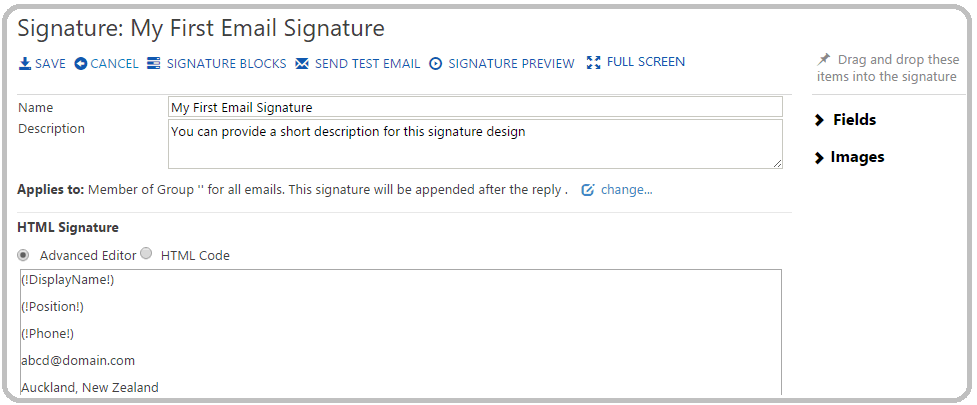
Action Buttons
SAVE - Save Signature Block configuration
CANCEL - Go out of this configuration
SEND TEST EMAIL - Send a test Email (available once you save your configuration)
SIGNATURE PREVIEW - View how your signature will appear when sent.
CANCEL - Go out of this configuration
SEND TEST EMAIL - Send a test Email (available once you save your configuration)
SIGNATURE PREVIEW - View how your signature will appear when sent.
If you are using signature blocks and you specify selection as 'external users' ensure you enter in a external user in the TO: field which will show the external information here.
FULL SCREEN - Maximise your current window
Name
This is a mandatory text field used to add a name to the signature design. By choosing a suitable name, it becomes easier for you to differentiate between the different signature designs.Description
This is a free text field which can be used to add notes or provide a brief description about this signature design.Drag and Drop items
These fields can extract information from any of the following:
- Windows Azure Active Directory (WAAD) - for CMS M365
- Active Directory (AD) - for CMS MSE
- A custom C# script
Field Lookup Configuration
Applies to:
Select Show details to expand this section.
This section specifies who will receive this signature, where to insert the signatures and the placement within the email
Selection
This section specifies who will receive this signature design. A signature configuration can be assigned to an individual user (Person) or a Group within your Directory, or an Organizational Unit (OU)NOTE: OU only applies to CMS MSE
The other option is to assign the signature configuration based on a RULE.
a. Member of Group
The signature can be applied to an individual user, an address book group and a wild-card based on the organisational unit.
Click on the BROWSE button to view the Groups or Users in your Directory.

b. Rule
A rule is a "C# Script". If the rule returns "true" then the signature configuration will be applied.
If you have a rule created (Configuration for rules can be found in Admin > Rules) you can choose which rule to use by clicking Select a Rule
For information on how to create a rule click here: Rules

Insert Into
This section will determine when to append this signature.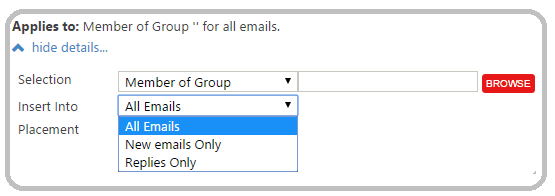
a. All Emails - The signature will always be inserted.
b. New emails only - The signature will only be inserted if the application cannot detect a "forwarded/replied to" marker in the email.
c. Replies only - The signature will only be inserted if the application is able to detect a "forwarded/replied to" marker in the email.
b. New emails only - The signature will only be inserted if the application cannot detect a "forwarded/replied to" marker in the email.
c. Replies only - The signature will only be inserted if the application is able to detect a "forwarded/replied to" marker in the email.
Placement
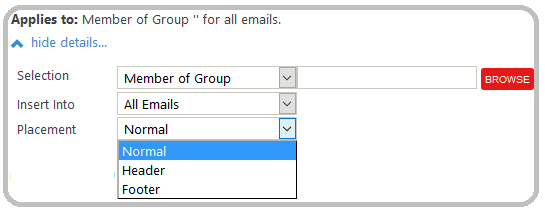
This section will determine where the signature will be positioned in the email.a. Normal - The signature is inserted after the new email and before the reply/forwarded email.
b. Header. - The signature is inserted at the top of the email.
c. Footer - The signature is inserted at the bottom of the email.
b. Header. - The signature is inserted at the top of the email.
c. Footer - The signature is inserted at the bottom of the email.
HTML Signature
The following Editors are available to create the signature design.Advanced Editor Create and update the signature design using the HTML Code
HTML Code Create and update the signature design using HTML Code
This window allows you to create your signature design using the Menu bar as well as the drag and drop feature.
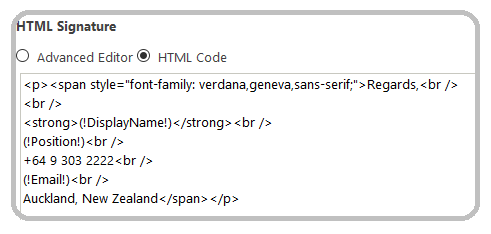
Plain Text Version:
The plain text area operates the same way as the HTML signature above. It will display the plain text version of the signature.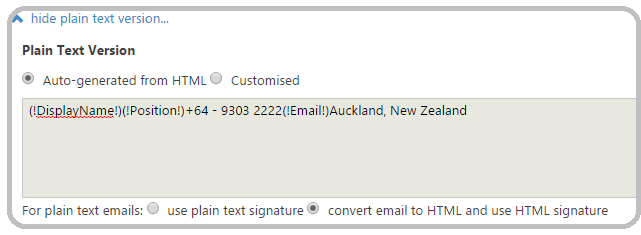
Auto-generated from HTML
By default the plain text version will auto generate a version from the HTML signature design.Customised
This allows you to override the automatically generated plain text signature.For plain text emails: select how the plain text emails will appear.
use plain text signature
Use plain text signature if the email contains plain text.
convert email to HTML and use HTML signature
If the email contains a text/plain MIME part, this will be converted to HTML and the HTML signature will be appended.
Signature Template
To create a new Signature using Crossware Email Signature Template > Select option CREATE FROM TEMPLATE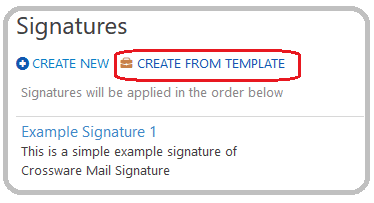
Template wizard window opens with template signature design options.
Select a template click on NEXT
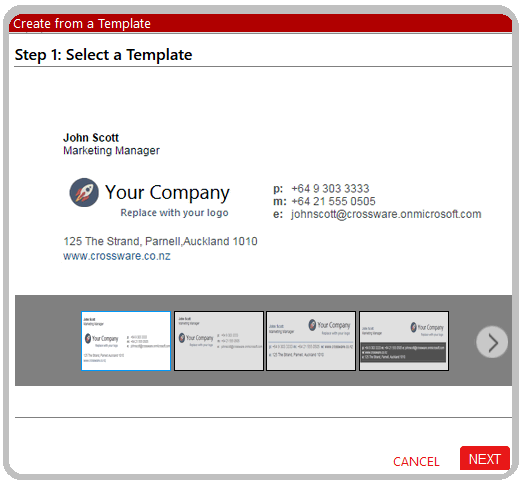
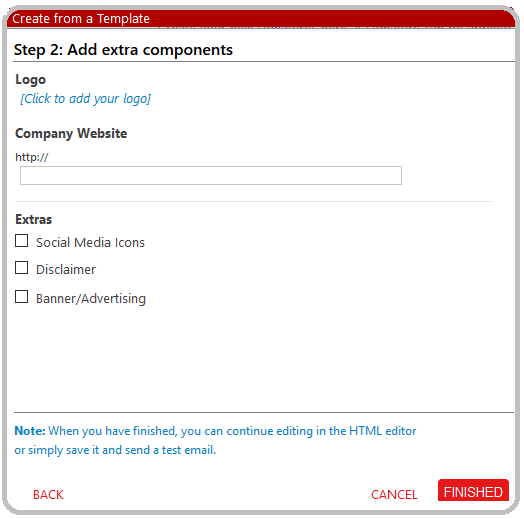
Select and add your logo, Company Website and any extra features required.
When you are done > click on FINISHED.
NOTE: When you have finished, you can continue editing in the HTML editor or simply save it and send a test email.
Action Buttons
The following action buttons are available at the top of Signature Designer page.
SAVE: This button saves the signature design.
CANCEL: Will close out of your signature design.
SEND TEST EMAIL: This button allows you to send a test email to a specified recipient with the current signature attached. This also enables you to test the customised look-ups in the signature. It is a great way to ensure that all signature components are working before you apply them to actual users. You can also send the test email on behalf of another user to see how their signature will appear at the recipient. In the following case, we are sending a test email to an external Hotmail account.
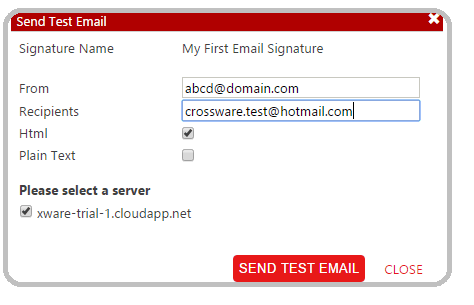
From/Recipients fields: These fields can contain any value to route the email to the user account that you would like to check it from.
Plain Text/HTML: This refers to the format of the email.
Server: This allows you to select a server through which you want to route your test email.
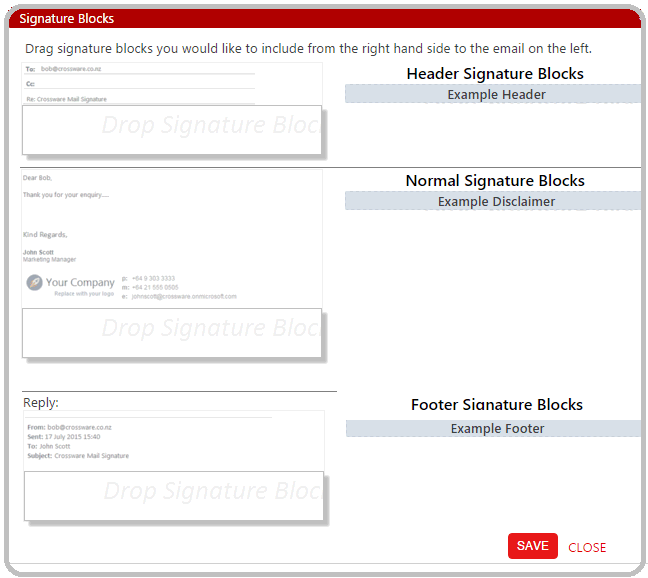
Signature Blocks: Clicking on the "Signature Blocks" button will display the Signature blocks you have available if you have created any in the Signature Block menu. From here you can add signature blocks to your Signature if required by dragging the block from the left hand side to the email on the left.
Signature Blocks Guide
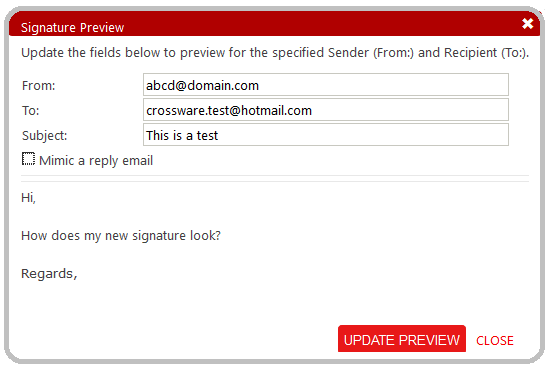
SIGNATURE PREVIEW: Allows the preview of your current signature and any signature blocks included.
From and To: fields when updated will preview for signature assigned to the specified sender.
Mimic a reply email: this will allow you to view how a reply email will display
Update Preview: will refresh and changes made.
FULL SCREEN: This feature will expand your current window. To disable full screen select Back to Main Screen
What does the Recipient See: Once you've sent a test email, you can log in to the recipient's mailbox to see the signature.
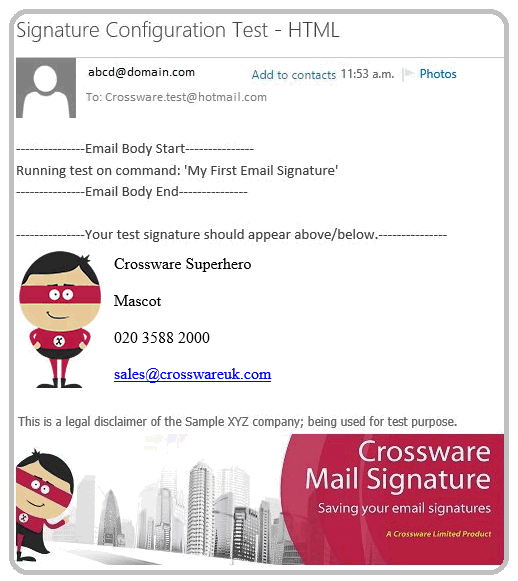
As we can see, the recipient has received the email which contains the main signature along with the two signature blocks (Legal Disclaimer + Ad Banner).
CLOSE: This button takes you back to the main page where you can see all the other signature configurations.

